

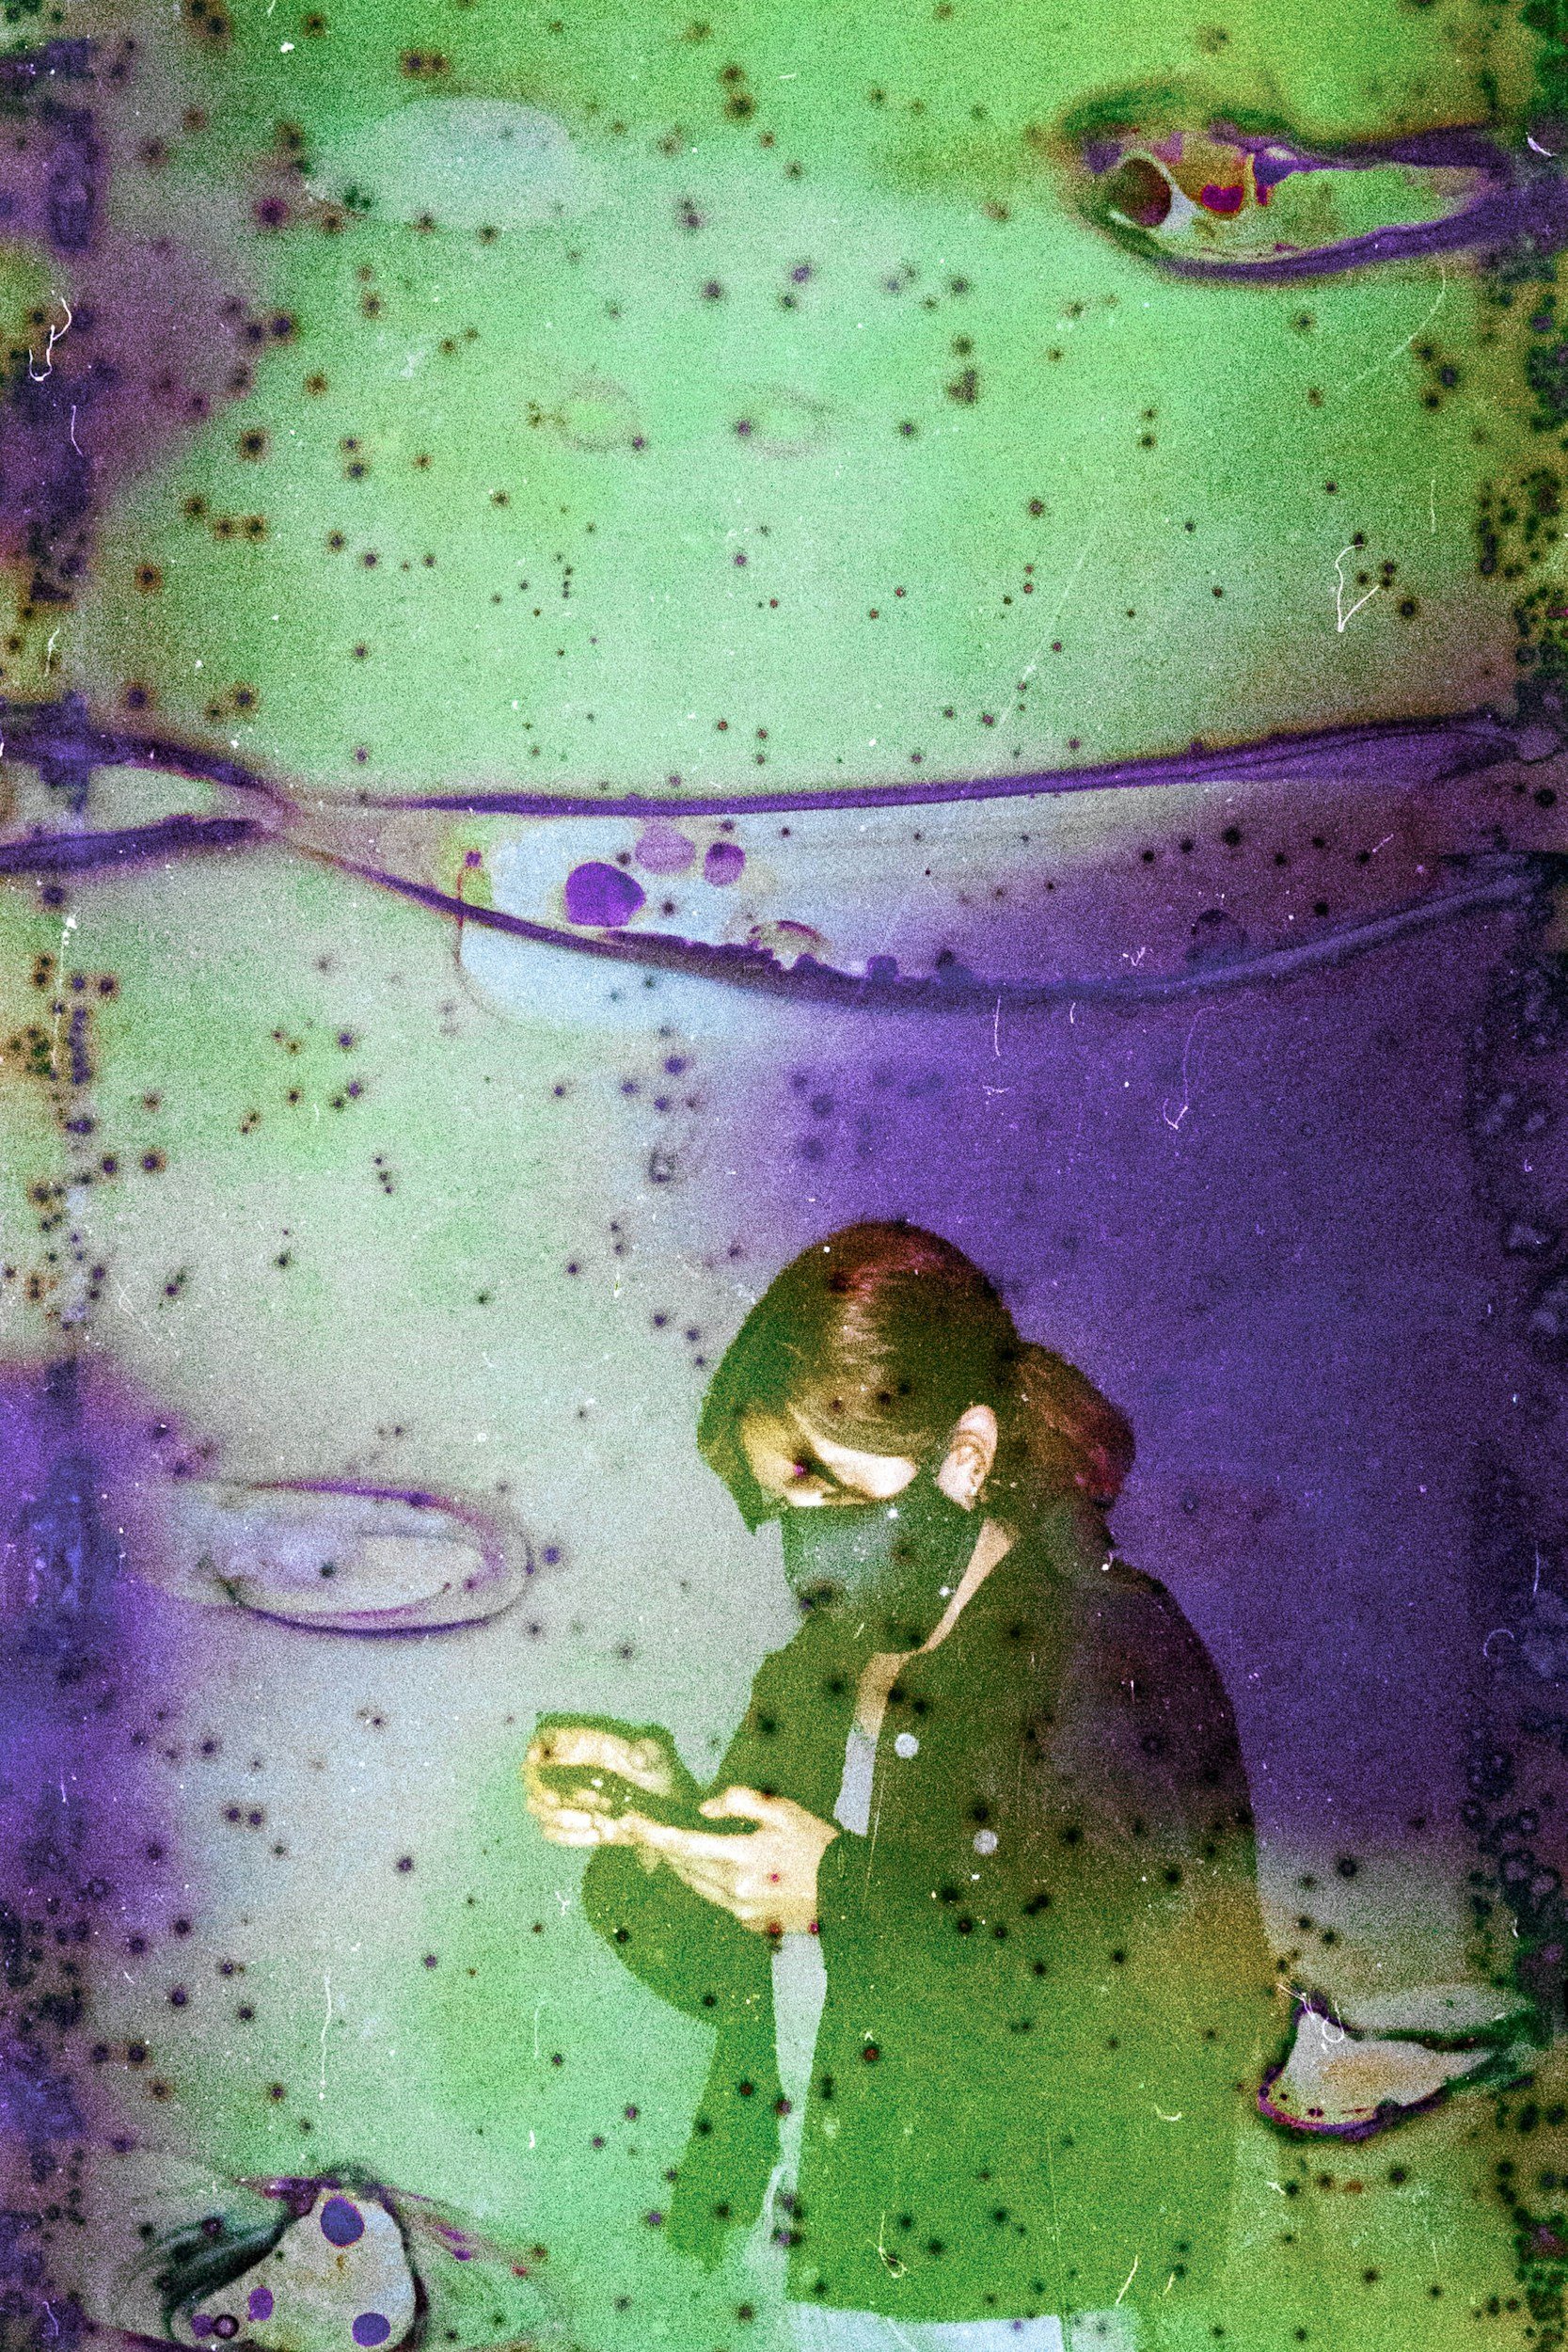
Film soup is an experimental analog technique where film rolls are soaked in liquid mixtures—anything from household products to more unexpected ingredients—to create unpredictable, often surreal photographic effects. It’s a way to let go of control and invite chaos into your creative process, whether you soup before or after exposing the film.
This process can result in vibrant color shifts, chemical burns, dreamy textures, and other-worldly distortions that make each frame one of a kind. It’s a favorite for artists who want to break the rules and explore new aesthetics beyond what traditional film offers.
In this post, I’m sharing 10 unique film soup recipes I’ve used (or been curious to try), along with some key tips on how long to soak, what ingredients to use, and what to expect when it comes time to develop your film.
Understanding Film Soup
At its core, film soup is about chemical reactions. The substances you soak your film in interact with the emulsion—the light-sensitive layer on your film—and alter how it reacts to light or how the image is processed later on.
You can use common items like lemon juice, soda, salt, vinegar, or dish soap… or you can get a little weirder with things like wine, hot sauce, energy drinks, or even detergent pods (yes, seriously). Each combo yields totally different results.
There are a few variables to play with:
• Pre- vs. Post-Exposure: You can soup film before shooting or after. Before exposure tends to give you more subtle effects, while post-exposure can be more intense and chaotic.
• Soaking Time: Some people soak for 5 minutes, others for days. More time usually means more dramatic results—but also a higher chance of damage.
• Temperature: Warmer temps tend to intensify the effect. Some artists even boil their film (carefully).
• Dry Time: After souping, you’ll need to let your film dry completely—typically 7–10 days—before sending it to a lab or developing it yourself.
One important note: Film souping can ruin your film if you’re not careful. But that’s kind of the fun of it. It’s part art, part experiment.
Film Soup Before Shooting
Pros:
Predictable effects: Soaking the film before exposure allows you to anticipate how the soup will interact with the images.
Creative planning: You can make strategic decisions about subjects and compositions based on expected alterations.
Cons:
Increased risk: Pre-soaked film may damage your camera if not fully dried or cleaned properly.
How-To:
Soak your film in your chosen solution.
Allow the film to dry thoroughly, ideally for about 10 days, ensuring no residue is left that might damage your camera.
Load and shoot your film as usual.
Film Soup After Shooting
Pros:
Safer for equipment: The film is exposed and rewound safely in its canister, minimizing any risk to your camera.
Surprise elements: Soaking the film after exposure often results in more unpredictable and surprising effects.
Cons:
Less control: The random nature of the results can be less predictable.
How-To:
Shoot your film as you normally would.
Once completed, soak the exposed film in your chosen concoction.
Allow the film to dry completely, keeping in mind the same precautions for drying time.
How Long Should I Soup My Film For?
The duration of your film soup is flexible, ranging from minutes to several weeks. Here are some general guidelines:
Mild Effects (Subtle changes):
Soaking Time: 1–8 hours
Ingredients: Lemon juice, salt, coffee, soda
Description: Produces slight color shifts and mild effects. Good for beginners wanting to see the impact of film soup without drastic changes.
Moderate Effects (Pronounced changes):
Soaking Time: 8–12 hours
Ingredients: Tea, cola, light vinegar
Description: Creates more noticeable color shifts and textures. Suitable for those looking to experiment further.
Strong Effects (Dramatic changes):
Soaking Time: 12–24 hours
Ingredients: Strong vinegar, detergent, hot sauce
Description: Results in bold, vibrant effects with significant color and texture changes. Perfect for experienced film soup enthusiasts seeking dramatic results.
Extreme Effects (Highly altered images):
Soaking Time: 24 hours to 1 week
Ingredients: Floor polish, strong acids, or a mix of potent ingredients
Description: Yields extreme and often unpredictable results, with the risk of losing detail. Best for those who enjoy high-risk, high-reward experiments.
Temperature Considerations
Temperature can significantly affect the outcome of your film soup. Here are some tips:
Hot Water Soak: Running your film through hot water for 10–20 minutes before soaking in your chosen mixture can enhance the effects and speed up the chemical reactions.
Room Temperature: Most soups are done at room temperature, providing a baseline for the reactions without accelerating the process too much.
What Are the Best Ingredients for Film Soup?
Creating a film soup recipe is a DIY project with no strict rules. You can experiment with various ingredients, but experienced film soup enthusiasts often use:
Water, cola, juice, wine, beer, coffee, contact lens solution, vinegar, soy sauce, and more.
Acidity in the mix can enhance the chemical reactions.
10 Creative Film Soup Recipes
1. The Citrus Twist
Ingredients: Lemon juice, lime juice, and a pinch of salt.
Soaking Time: 5 minutes.
Expected Effects: Boosts contrast and adds a slight yellow to green tint, giving photos a warm, vintage look.
2. The Color Burst
Ingredients: A teaspoon of dish soap, a few drops of food coloring, and warm water.
Soaking Time: 3-4 minutes.
Expected Effects: Adds random splashes of color and subtle light streaks, making each photo unique and vibrant.
3. The Vintage Sepia
Ingredients: 2-3 black tea bags in boiling water.
Soaking Time: 10-20 minutes, depending on the desired intensity of sepia tones.
Expected Effects: Softens images and adds a brownish tone, mimicking the look of old sepia photographs.
4. The Dreamy Blur
Ingredients: Rubbing alcohol, a few dashes of sea salt, and warm water.
Soaking Time: 5 minutes.
Expected Effects: Softens sharpness, creating a dream-like blur around light sources and edges, adding an ethereal quality to photographs.
5. The Fizzy Pop
Ingredients: Cola and a splash of vinegar.
Soaking Time: 1-2 hours.
Expected Effects: Enhances colors and adds a bubbly texture to the images.
6. The Coffee Kick
Ingredients: Strong brewed coffee and a dash of salt.
Soaking Time: 6 hours.
Expected Effects: Adds warm brown tones and enhances shadows, giving a vintage feel.
7. The Spicy Twist
Ingredients: Hot sauce and lemon juice.
Soaking Time: 30 minutes.
Expected Effects: Creates fiery red and orange streaks and enhances contrast.
8. The Sweet Treat
Ingredients: Soda (any kind) and a splash of fruit juice.
Soaking Time: 2-3 hours.
Expected Effects: Adds random color shifts and a sugary sheen to the images.
9. The Alcohol Splash
Ingredients: Beer or wine.
Soaking Time: 4 hours.
Expected Effects: Introduces random color shifts and a grainy texture.
10. The Vinegar Wash
Ingredients: White vinegar and water.
Soaking Time: 1 hour.
Expected Effects: Adds high contrast and a gritty texture, with potential for bold, unpredictable color changes.


My Favorite 35mm Films for Soups
Different films react to soup in their own unique ways, and that’s part of what makes the process so fun. Some films hold up better under pressure, while others completely fall apart in the best possible way. Here are a few of my go-to 35mm stocks that consistently give me dope results:
Why I ❤️ It: Ultramax is reliable, easy to find, and holds color well—even when it’s been through the wringer. It has a nice balance of saturation and grain, which makes it super versatile for film soup. I’ve had the most fun with this one when using acidic ingredients like lemon juice or cola—it brings out rich oranges, neon reds, and dreamy hazing effects without totally destroying the emulsion.
Why I ❤️ It: This one has a clean, vivid palette that leans slightly green, and it responds really well to organic, subtle soups like tea, coffee, or even herbal infusions. It enhances those Fuji greens and reds in a soft, painterly way. I love souping this film post-exposure—it keeps detail while still letting the chaos in.
Why I ❤️ It: Even though it’s black and white, HP5 reacts beautifully to more extreme soups. Think vinegar, dish soap, hot sauce—stuff that’s a little more aggressive. Instead of color shifts, you’ll get unpredictable contrast changes, soft washes, streaking, and sometimes ghost-like halos or distortion around your subjects. It’s great for moody, textured work.
4. Lomography Color Negative 400
Why I ❤️ It: Lomo 400 is already a little wild on its own, so when you soup it, it really takes off. It’s super responsive to just about anything—wine, pickle juice, detergent—whatever weird combo you throw at it. The colors can shift dramatically, sometimes unpredictably, and it adds a lot of grain and texture, which feels perfectly on-brand for Lomo lovers. It’s forgiving, fun, and always a surprise.
5. Cinestill 800T
Why I ❤️ It: Okay, this one’s a little riskier—and a bit more expensive—but when it works, it really works. The tungsten balance and halation effect give souped Cinestill a cinematic, alien-world vibe. It plays well with cooler soups like tonic water, gin, or aloe vera juice, and the results can be hauntingly beautiful or straight-up warped. Just make sure it’s fully dried before scanning—Cinestill’s anti-halation layer makes it more delicate.
Can I Give My Film Soup to a Lab?
Some labs will take souped film, but not all of them will. The chemicals you use can leave residue that might mess with their equipment—or worse, ruin someone else’s film. Always let the lab know you’ve souped it and be upfront about what you used. Then they can decide if they’re comfortable developing or scanning it.
If you’re planning to send it in, make sure it’s totally dry—like 7 to 10 days dry. Otherwise, you can always develop it at home and have full control over the whole process (and the chaos).
Final Thoughts
Film soup is wild. It’s unpredictable, messy, and one of the most fun ways to get weird, beautiful results with your photos. Whether you soup before or after shooting, just lean into the chaos and see what happens.
Have fun with it.
-V